7) Mount and centre the crystal
To mount your crystal, the goniometer must be in the right position. This was accomplished way back in part 3 where you clicked the "Center" button on the APEX3Server window. The goniometer head has a magnetic top and the mounting pins are fitted with a (magnetic) steel base. This makes mounting and retrieving crystals fast and easy. Prior to mounting, the diffractometer should look something like this:
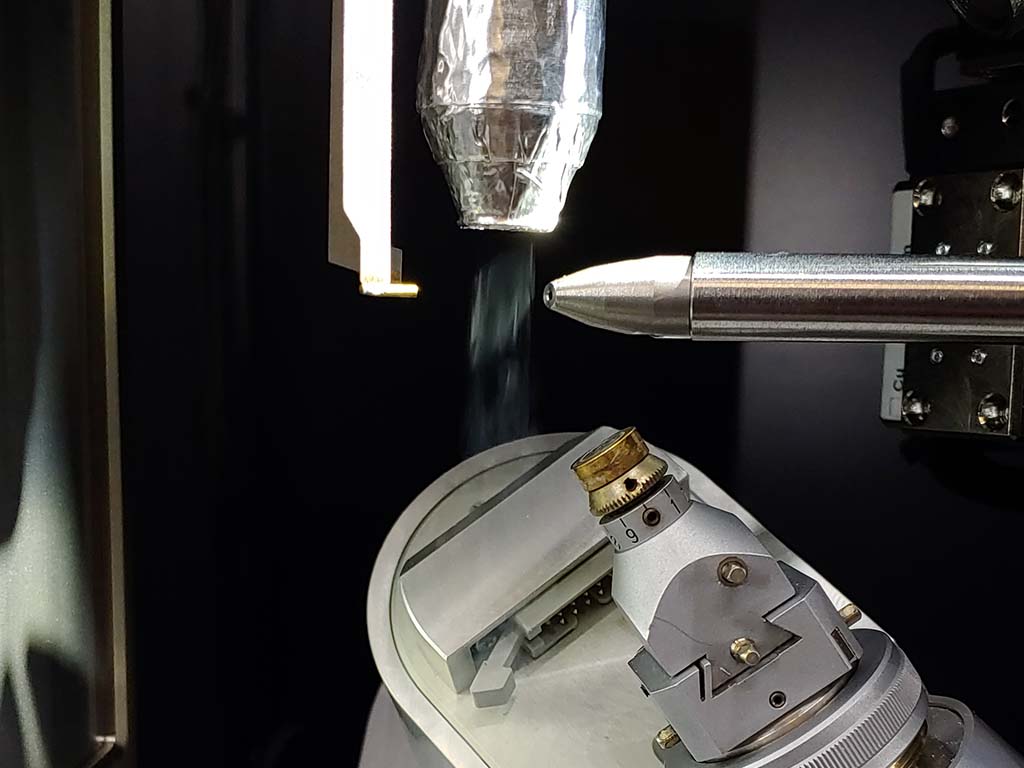
The base fits snugly on the goniometer head and the strength of the magnet ensures that it will not move. Practice the action of mounting the pin. The magnets are quite strong, so it is best to first get one edge of the base in place and then straighten up the pin and it should snap into place. Try to avoid touching the front surface of the detector. Your hand movements should become automatic, requiring no thought. The result looks like this:
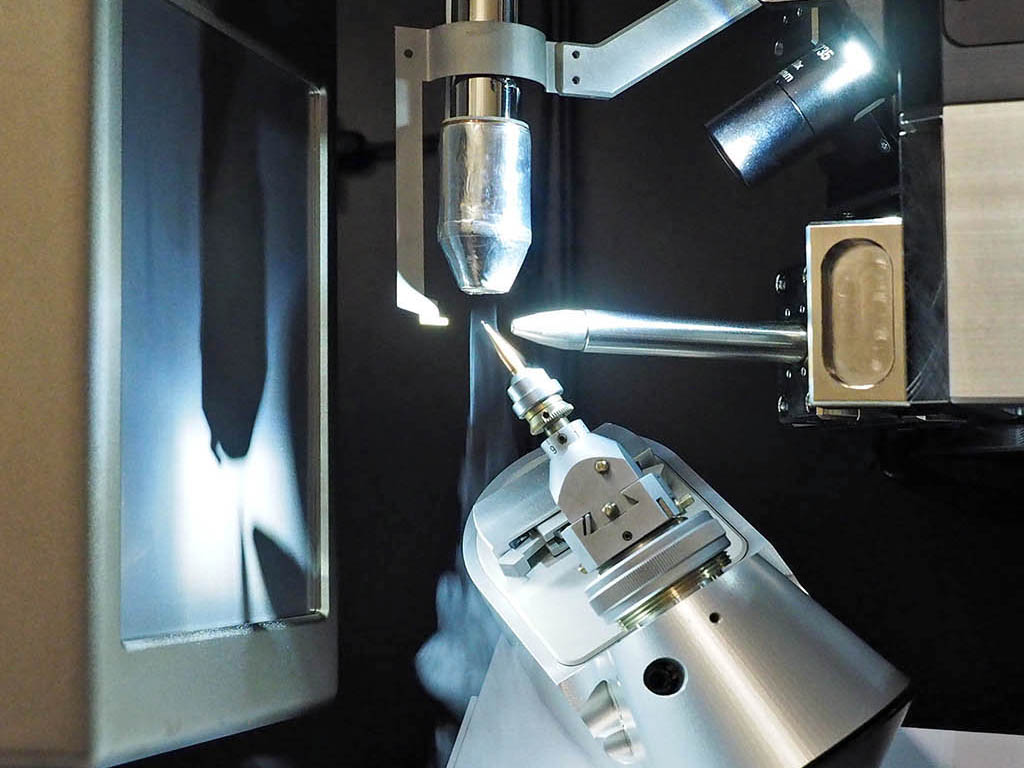
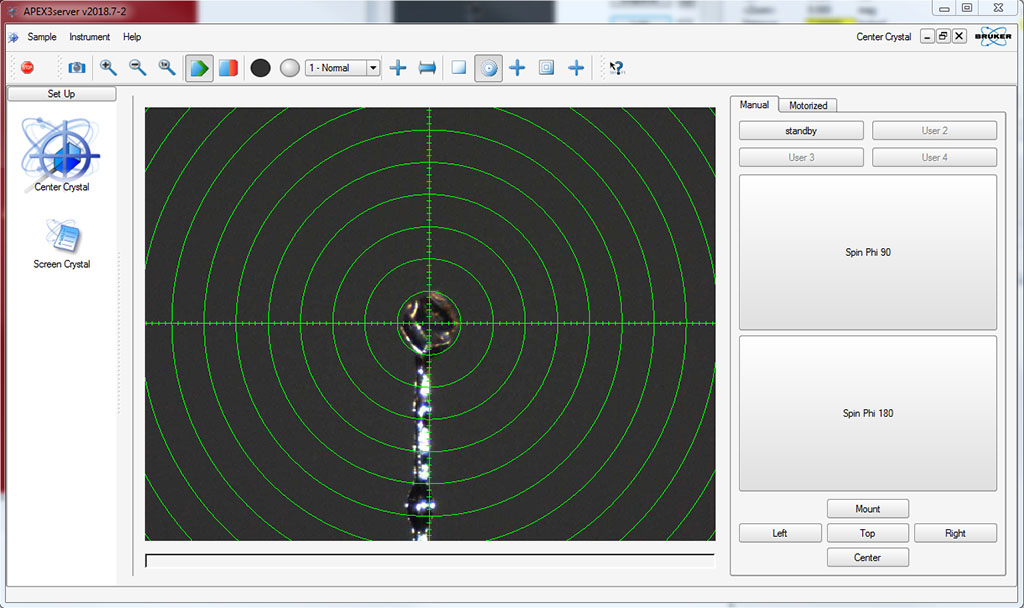
In the above picture you can see why we always mount the crystal at an elevated χ angle. If χ (or κ) were set to 0°, the cold stream would blow down the shaft of the pin and onto the goniometer head, which is bad. Now that the crystal is mounted, it needs to be centered. In the above picture there are two adjustment screws on the side of the goniometer head facing you. The upper screw changes the height, and the lower screw adjusts the horizontal position. Unless you know what you are doing, it is best to only twiddle the adjusters that are facing you. Do not worry if the crystal is out of focus - that will be fixed after rotating the crystal. The view in the APEX3Server window on the second monitor will probably look something like this:
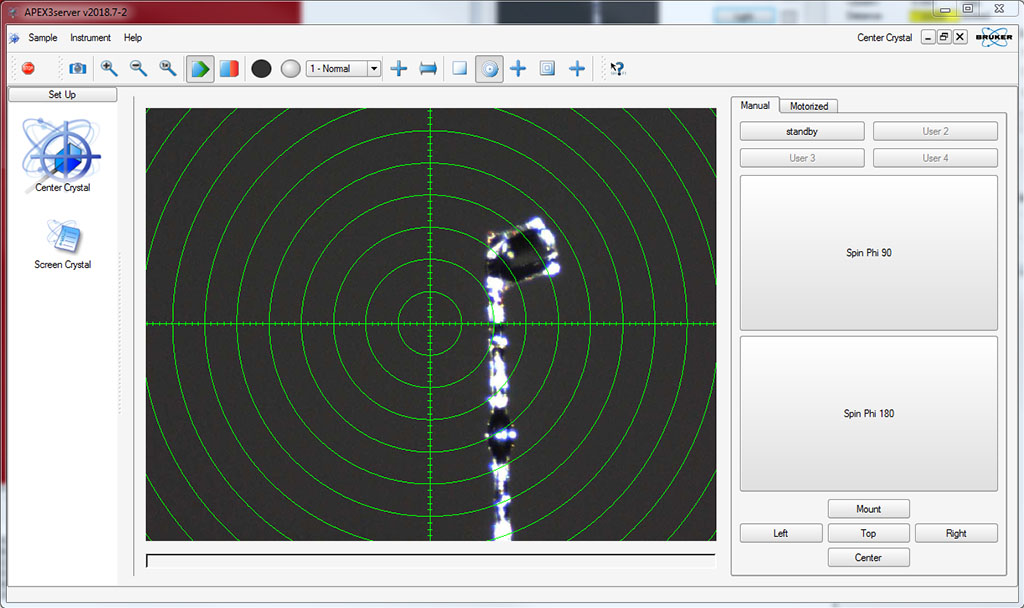
Carefully twiddle the upper screw until the crystal cuts the horizontal marker line at as close to halfway as you can, then turn the lower screw until it is centered in the middle. It ought to look like this:

The crystal is now centered in two directions only. It needs to be spun 90° and adjusted again, like this:
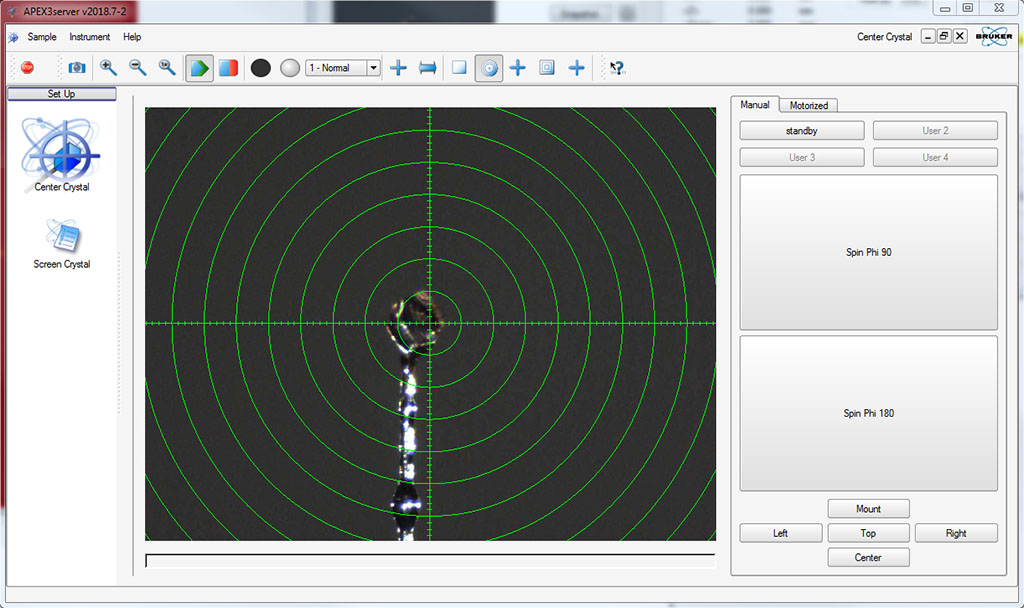
With the goniometer head spun 90° around, a different screw adjuster is now facing you. By now you should know what to do. The height screw is only present on one side of the goniometer head, so if you need to further adjust the height, you'll need to go round again. It is usually a good idea to carefully watch as the crystal rotates. Even if the crosshairs are misplaced a bit, just optimize until the crystal does not wobble side-to-side relative to the gauge rings. When you're done it ought to look like this:
You are ready to diffract some X-rays! Carefully close the cabinet doors and proceed to part 8.