6) Choose the most suitable crystal
The crystal you choose largely dictates the effort needed later. Good crystals can give good data or lousy data, but lousy crystals only ever give lousy data. It usually takes a bit of practice to routinely pick the best available crystal. Some people get the hang of it almost immediately while others seem to never get it. You are aiming to pick a crystal with sufficient volume, so blocky crystals tend to be better than needles.
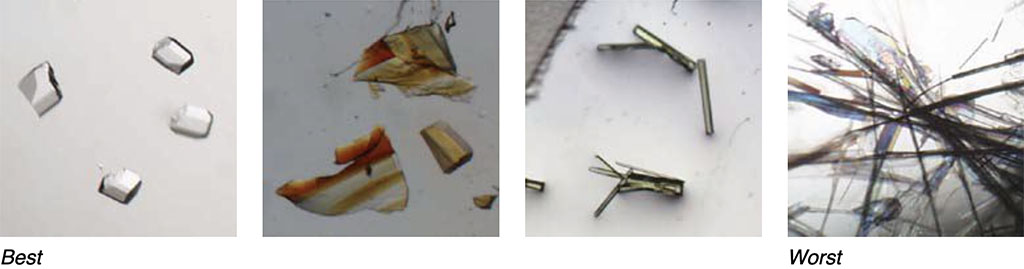
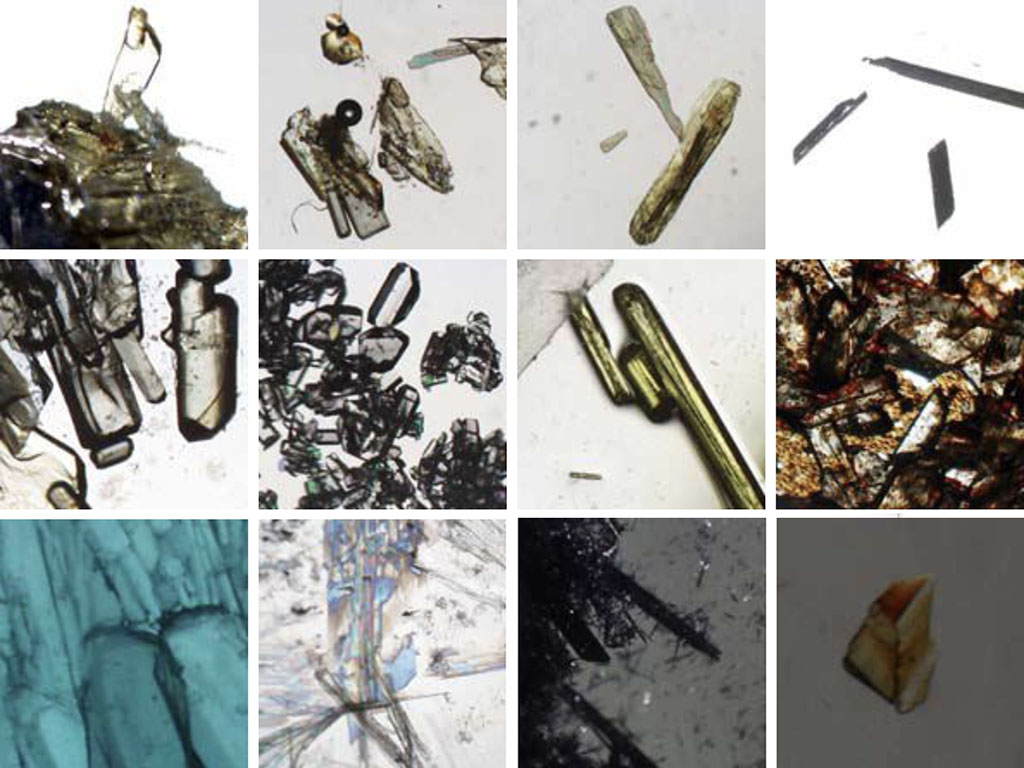
Crystals come in all shapes and sizes. A good size for organics with all atoms lighter than (say) sulphur would be a block ~0.2mm on a side, but that's just a guide. Some visually stunning crystals end up being much worse than crystals that are not so pretty. The golden rule is to try them. Even if they are <0.1 mm on a side, try them. Larger crystals with heavy atoms will cause absorption problems, i.e., when the X-ray beam is absorbed by different amounts for different reflections. The problem is that each reflection is attenuated differently, by an amount that is not known a priori. Although it is usually possible to correct for this to varying degrees, it is much better to pick a crystal that minimizes the problem to begin with. Absorption corrections will be covered elsewhere. Sometimes none of the crystals seem to be free of problems. Do not despair. All the samples below eventually gave acceptable data, but they all required surgery. Cutting, breaking, and cleaning are all important skills that you should learn.
The oil makes it easy to manipulate the crystals using a needle and to perform surgery (e.g., with a razor blade) because it holds the crystals steady while you work on them. Transparent crystals are best checked between crossed polarizers. Swivel the polarizer on the very bottom of the microscope objective: see how the view goes light and dark. With the polarizers crossed (dark view) slowly turn the microscope stage or the crystal slide. Observe how the crystals go light and dark as you rotate them.
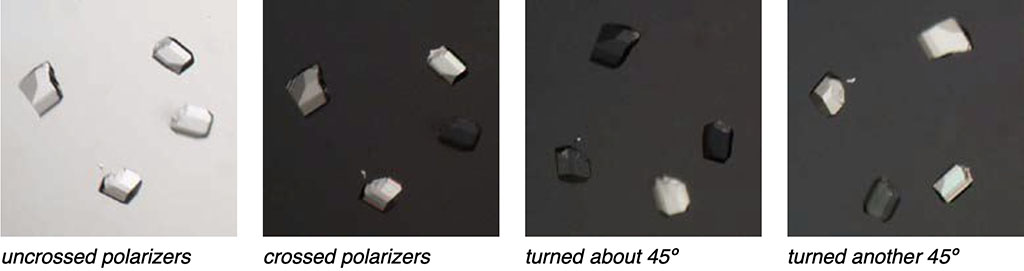
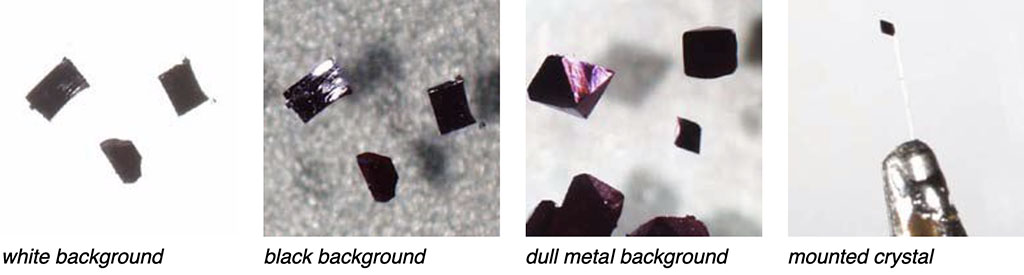
This tells you if the crystals are twinned, cracked, or are aggregates. If your crystal has two or more regions that disappear at different times or if it doesn't disappear at all, then you likely have a problem. Aggregates and cracked crystals can often be separated, as can some twins. Twinning is complicated stuff that needs a whole separate document, just to explain the basics. Opaque crystals usually require reflected light and can be viewed with either a white, black or some other background.
At some point you should sketch and measure the crystal. If you know that your crystals are stable you can do this now. Otherwise you should measure it after data collection. It can even be measured on the diffractometer using the video image. For off-line measurement, when the SZX12 microscope ZOOM is set to "25", then one small division in the eyepiece reticle is a tenth of a millimetre. The SZX9 microscope (currently in the lab director's office) is a little different. On the SZX9, with a ZOOM of "25", 0.1mm is 2.5 small divisions. Feel free to play with the microscope and figure out what the scale is on other ZOOM settings.
The best way to pick up the crystal on the mounting pin can be a matter of personal preference. Since you should try to minimize the amount of oil on the mount, it helps to first transfer your chosen crystal out of the main dollop of oil and onto a clean part of the glass slide. There's no best way to explain the crystal pick-up process in words. Experience is essential and practice makes perfect.
It is now time to transfer your mounted the crystal to the diffractometer, so proceed to part 7.