1) Make sure the low-temperature machine is running
Do this NOW so that the cold stream has time to reach normal operating temperature. Data collection is typically run at 90 or 100 K (-183°C or -173°C) in the UK X-ray facility. There is nothing special or magic about 90-100 K, it just happens that on this machine, liquid nitrogen consumption is about one tank every two weeks in that temperature range.
If the low-temperature (LT) device was left in "stand-by" mode (about 1.6V on the display), then you need to crank up the power and wait about 5 to 10 minutes for the cold-gas stream to reach (say) 100 K. Assuming novice status, it will probably take at least that long to select a crystal and get it mounted, so this delay should not hold up the process.
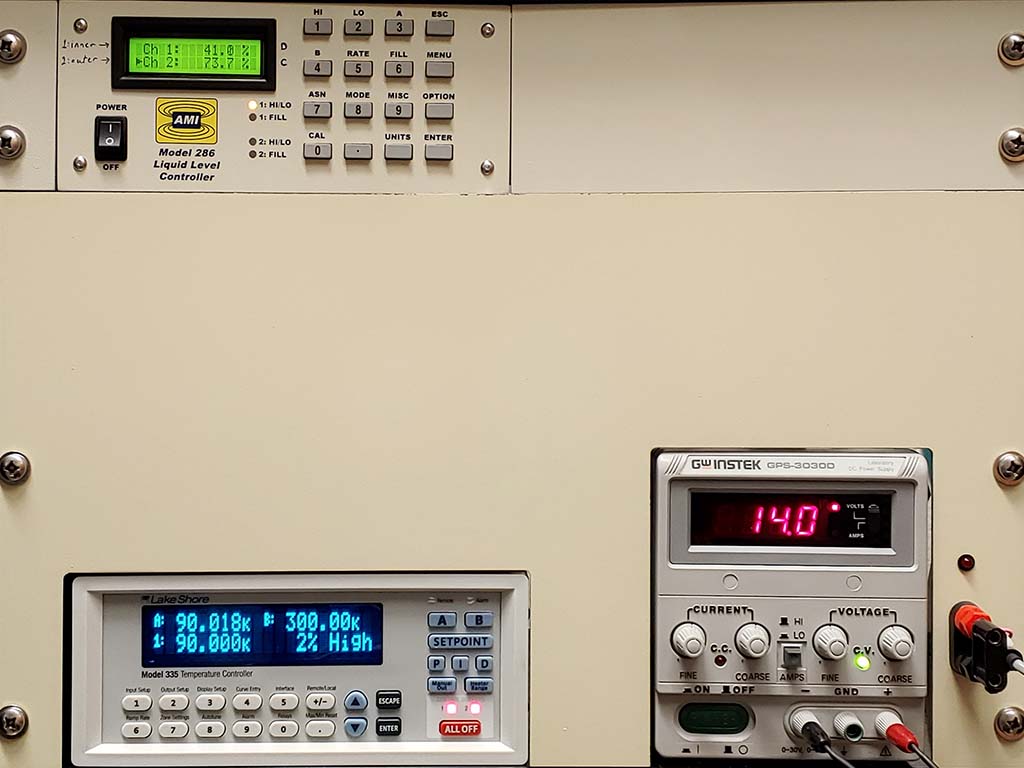
The LT machine control box has three sections:
Upper left - liquid nitrogen level indicator and control.
Lower left - temperature indicator and control.
Lower right - nitrogen stream flow control.
Under normal circumstances, all you need to do is to turn the VOLTAGE control on the lower right until the display indicates about 12-14 V. The temp. controller (lower left) automatically adjusts heaters within the transfer line to maintain the set-point temperature. There are coarse and fine tune knobs. Use the coarse knob first, if you're good you will nail it. Fine motor skills are your friend. Don't adjust the current. If the temperature has not stabilized after ~10 minutes (rare) then crank it up by a volt. You should not need to go any higher without good reason. If those instructions make no sense, seek professional help.
The temperature control box gives the temperature a short distance up inside the nozzle. Provided the flow is laminar and the crystal is well centered, the crystal temperature will be very stable. Also shown is the nozzle temp. (300K), which ensures that the outer nozzle surface is above the dew point and that the cold stream has a concentric sheath of warm dry nitrogen. This provides a sufficient barrier to prevent frost gathering on the crystal.
The big blue dewar behind the diffractometer contains two concentric tanks. The outer tank (Ch 2) is refilled automatically from the 180L storage dewar. The inner tank level (Ch 1) is kept within a narrow range by continual topping off from the outer tank. In this way, the level within the inner tank stays pretty much constant, which is needed for temperature stability. At normal operating temperature, this LT machine is incredibly stable - better than ±0.1K at the position of the sensor. Above about 180K it is stable to ±1K or so, provided you optimize the PID settings on the controller. If you don't understand a word of that, don't fiddle with the control box!
The LT apparatus is explained in more detail elsewhere (it has a manual, but it's not an easy read). If you need special settings, such as higher temperature (e.g., to avoid a destructive phase transition), then seek professional help. It is not difficult to change temperature, it's just not pertinent to this tutorial.
On to part 2 ...