9) Inspect the diffraction pattern.
Go back to the KappaCCD Server window, click "Acquisition" and from the pull-down menu choose "Position Goniometer".
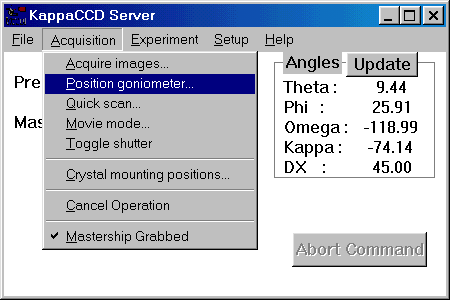
This brings up the following window:

Check the beam-stop position. It is unlikely that it will need to be adjusted, but if in doubt push it in close (~2mm) to the low-temperature machine nozzle.
Close the doors to the radiation enclosure - this is important
Set Theta to 0° (zero !)
Set DX to 40mm
Click the "Start" button
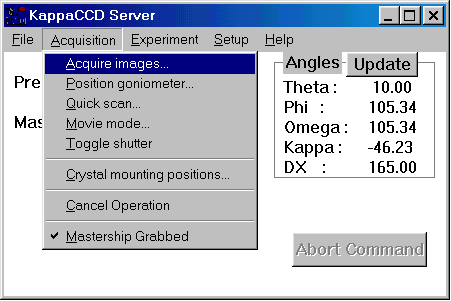
When the goniometer has finished moving, click on "Acquire images" in the KappaCCD Server window:
This will bring up a Scan input menu window. Set Omega to 2.00 and the scan time to 20 seconds, as shown below.
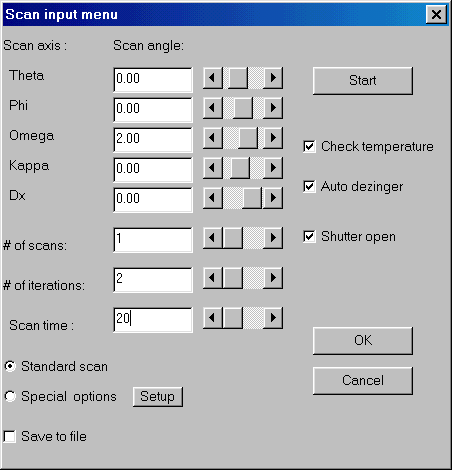
Click "Start" to take a test shot. It is usually a good idea to repeat the scan 90° further around in PHI. To do this, go back to "Position goniometer" and change the PHI angle.
If your crystal is big and chunky you may be able to get away with 10 seconds (or even 5). Small crystals may require longer.
If the diffraction pattern looks good, go on to the next step. Otherwise you may want to get a new crystal. If you can't tell the difference between a good and a bad diffraction image you should not be trying to collect data alone.
Return to the main Tutorials page or to the main X-Ray Lab page