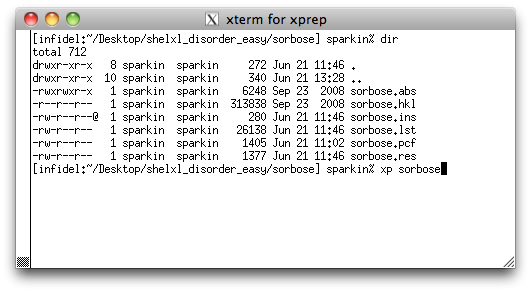
Start XP and load in the initial solution of the sorbose structure by typing
'xp sorbose' <return>. At the XP>> prompt, enter
fmol <return>, to give you something like the following:
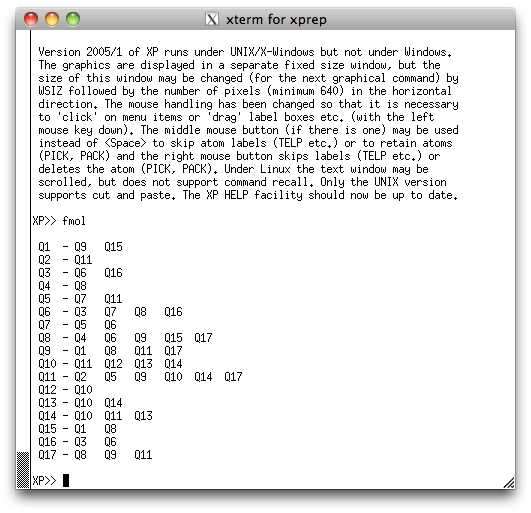
We're going to view this structure perpendicular to its mean plane. To do this, issue
the command 'mpln/n' and then the command 'proj', to get the following
projection in the XP graphics window:

It should be pretty obvious from this picture that Q17, Q16 and Q15 are not real
atoms, so let's get rid of them straight away. Click on the yellow EXIT button, and
then use the 'kill Q15 Q16 Q17' command in the XP text window, then
do proj again:
To get this in the XP graphics window (below):
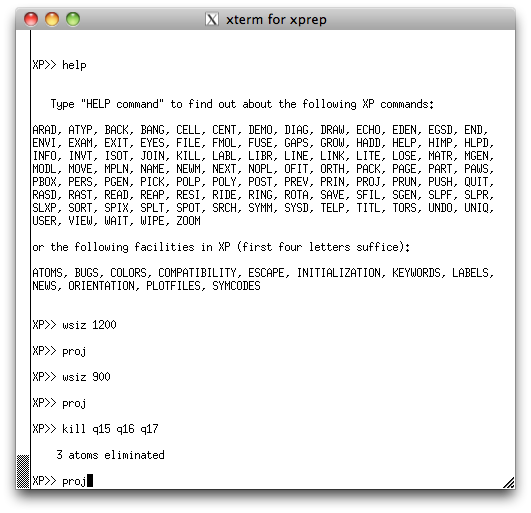
Incidentally, in the above image, the command WSIZ just resizes the XP graphics window. I needed to ensure that the window captures for this tutorial would not be excessively large (you can, of course, safely ignore the WSIZ command).
Incidentally, in the above image, the command WSIZ just resizes the XP graphics window. I needed to ensure that the window captures for this tutorial would not be excessively large (you can, of course, safely ignore the WSIZ command).
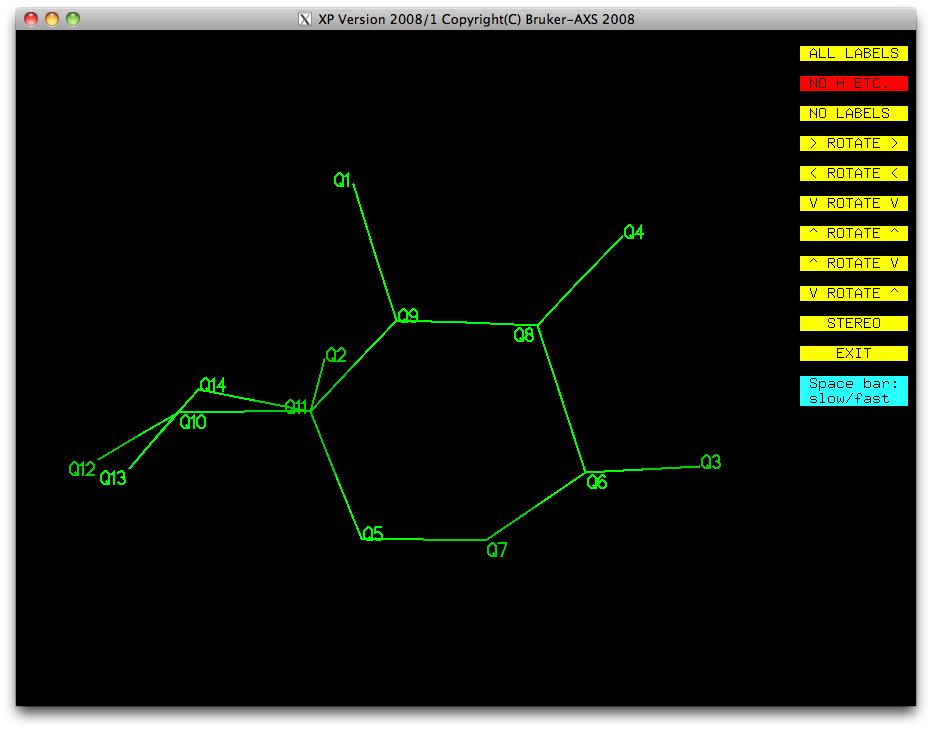
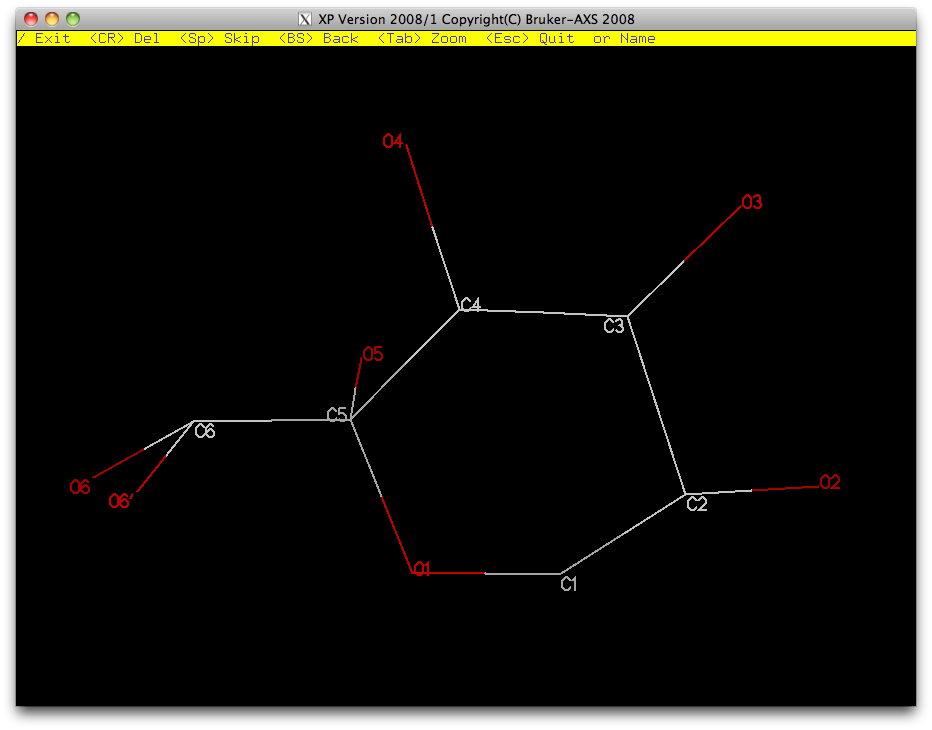
Most of this is looking pretty good. We have a ring (Q5-Q7-Q6-Q8-Q9-Q11), with a few
single atoms attached (Q3, Q4, Q1, Q2), and a bit of a mess made up of Q10, Q12, Q13,
Q14. Remember that disordered atoms in sorbose are likely to be amongst the higher
Q numbers because they have less scattering density than full-occupancy atoms. Let's
take a look at the peak list again in the XP text window:
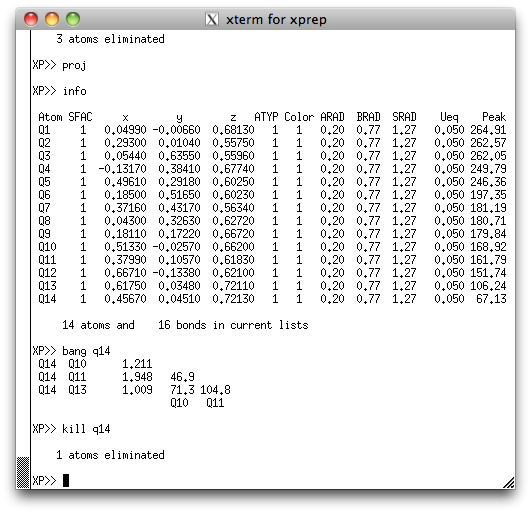
See how Q14 has a much smaller peak height than any other of the other atoms? Also
see from the XP graphics window above that the position of Q14 seems to be
too close to Q10? It seems quite likely that Q14 is spurious, but we can get more
evidence by asking XP how close it is to the surrounding Q peaks. We do this
with the 'bang' (that's bond lengths and angles). Go ahead and
kill Q14. Even if Q14 were real, it would come back in a difference map, so
there's little to lose.
At this point we have removed all the spurious atoms. The remaining Qs are real, and we can make an intuitive guess at which are oxygen and carbon. Since we know the structure of sorbose, we can also make the reasonable assumption that the disorder consists of the CH2OH group having its oxygen atom partially at the site of Q12 and partially at Q13. We are now almost ready to create a SHELXL model for the disorder, but first let's use pick and sort to rename and sort the atoms. If you don't remember pick and sort, take a look at the sucrose tutorial.
Once you have renamed the atoms, proj in the XP graphics window ought to look like this ...
... and after sorting the atoms, fmol should give something like this:
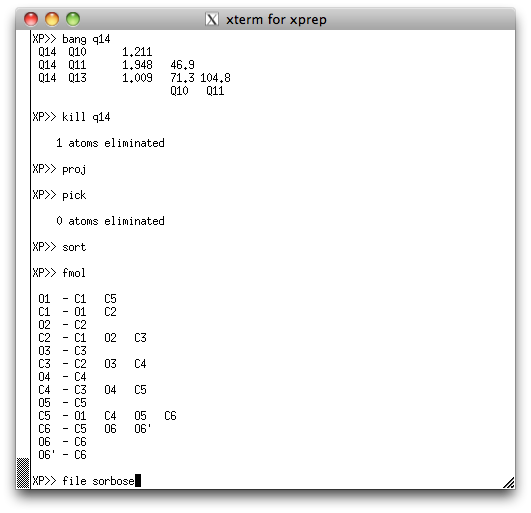
You don't have to sort them exactly like this, but a sensible order and careful
book-keeping is essential for disordered structures because it helps when things are
logically organized, especially if the disorder is complicated. Go ahead and save this
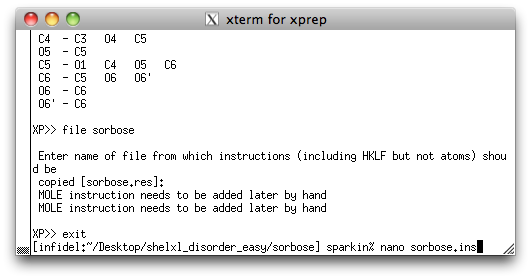
picked, renamed and sorted model as a new '.ins' file, using the command 'file
sorbose'. As usual, you will be asked where to get the rest of the instructions.
If you remember, these are usually found in the old '.res' file. By now you should know
this, but go back to the sucrose
tutorial if you are unsure. At this point you can exit XP and open the new
'.ins' file using a text editor, like this:
We are now ready to edit the SHELXL '.ins' file so that it includes a model
for the disorder. With most structures, however, it makes sense to run a few cycles
of refinement using SHELXL before you start to build the disorder model.
When SHELXL refines a partially correct model as we have here, the results
can be quite instructive. So let's run a round of refinement with SHELXL, and
look for the tell-tale warning signs of disorder.
Return to the first page of this tutorial
Return to the main Tutorials page or to the main X-Ray Lab page
Return to the main Tutorials page or to the main X-Ray Lab page