Gimbal Adapter for Homemade Panoramic Head
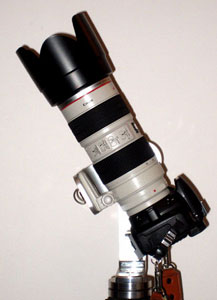
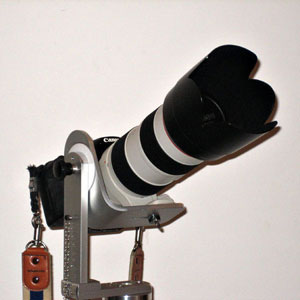
While modifying the elbow joint of my panoramic tripod head I realized that it would be fairly easy to make an interchangeable arm that would enable use as a gimbal head (à la Wimberley) for longer lenses. Since I had planned on making a gimbal head anyway I made a prototype, which works way better than I anticipated. It works so well that I scrapped plans for a separate gimbal head in favour of fine-tuning this gimbal attachment. With a Canon 20D and EF 70-200 f/2.8 IS lens mounted on it, this homemade gimbal head looks like this:
 |
 |
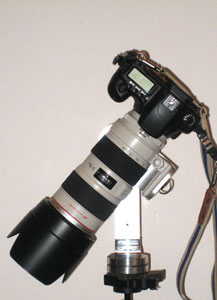 |
Although the EF 70-200 f/2.8 IS has image stabilization and is not that long of a lens it still benefits from being mounted on a tripod. Not surprisingly, such a camera/lens can feel a little unwieldy when mounted on a ballhead (especially a little one), but because the gimbal allows the entire mass to hang rather than perch, the whole assembly is perfectly balanced. It can be moved with fingertip ease and allows smooth panning in both horizontal and vertical directions for tracking moving objects.
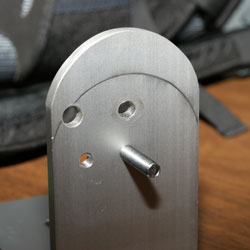
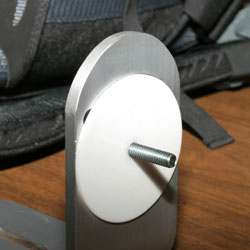
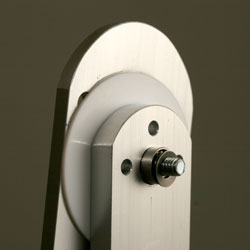
The gimbal-arm attachment for my panoramic head is pretty simple. Its components are shown here:
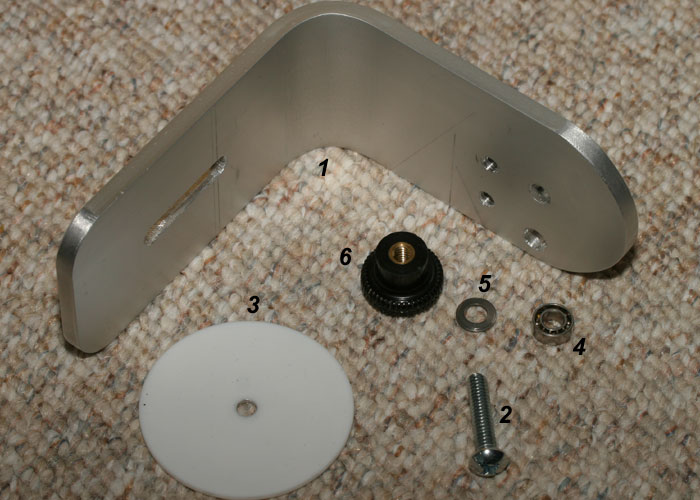
The pieces in this picture are as follows:
1) 90° Bar of aluminium that is 2.5" wide and 0.25" thick.
2) Phillips-head bolt (1/4-20 thread).
3) 2.5" Diameter disk of teflon.
4) 0.5" o.d. x 0.25" i.d. Ball-bearing race.
5) 0.5" Diameter belleville washer.
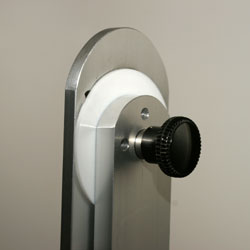
6) Plastic knob.
They fit together like this:
|
|
|
|
|
|
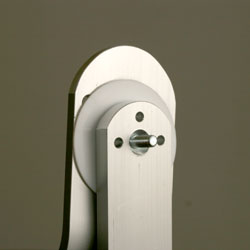
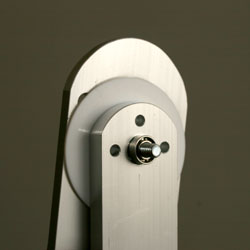
As with so many things, this gimbal attachment is a work in progess. Some of the excess metal above the teflon bearing, for example, needs to be trimmed off (where the pencil line is drawn), but only for the sake of æsthetics. The other holes in piece 1 (visible in the exploded view and in the top left image above) near where it attaches to the upright of the panohead assembly are left over from a former use of this piece; it was once part of an early prototype of my panohead. The slot cut in it that the lens tripod mount ring attaches through was cut at that time to allow refinement of nodal point assignment. I have no idea where one might find a piece of aluminium similar to 1 - mine was scrap; it came from a discarded wall bracket for some sort of monitor. The other parts, i.e. the teflon sheet, ball bearing, belleville washer and knob were retrieved from a junk drawer, but equivalent bits and pieces should be available from places like McMaster-Carr. Come to think of it, McMaster-Carr probably has aluminium stock suitable for bending into an equivalent of piece 1.
The stuff on this page is intended to be informative rather than impressive.
If you find it useful or have suggestions for improvements, please let me know.
All words, pictures and original concepts are © Dr. Sean Parkin (2006/11/01)