3/6) KappaCCD: Create .sad Files for SADABS
Next we create input files for SADABS. This can be done manually in a
terminal window with x2sad or it can be run from SuperGUI, which is
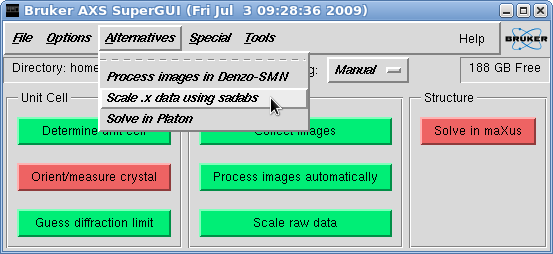
very much more convenient. Click on "Alternatives" and a drop-down menu allows
you to pick "Scale .x data using sadabs".
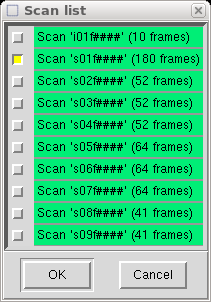
This brings up the "Scan list" window. Since we are going to process 'fast'
and 'slow' scans separately, we need to create separate .sad files for scan 1 and
scans 2-9 (or however you arranged your scans). Here we'll do the 'fast' scan first,
so deselect all scans apart from the first. You should ignore the scan labelled
'i01f####', as it just contains the initial indexing frames.
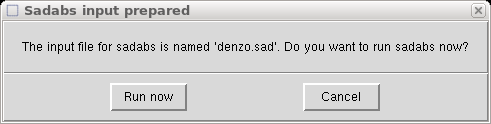
When you click "Ok" it extracts all the necessary information from the Denzo
".x" files and writes it to a file named "denzo.sad" that is read by SADABS.
It then asks if you want to run SADABS now.

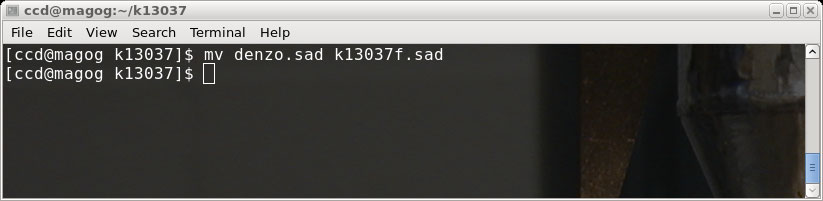
You could do that if you like, but in this tutorial we will click "Cancel" and just
rename the denzo.sad file for use later, like this (in a terminal window):
We then go back to the SuperGUI window and click "Scale .x data using sadabs"
from the "Alternatives" drop-down menu once more.

This time, however, you should select only your 'slow' data scans (here scans 02-09).
As before, this automatically calls the x2sad program and creates a "denzo.sad"
file with information from the chosen scans. It again asks if you want to run
SADABS, and just as before we will click "Cancel" and rename the file:
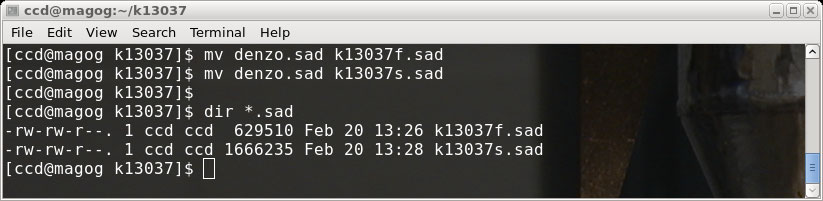
There are now two .sad files, k13037f.sad ('fast' scan) and k13037s.sad ('slow' scan).
In part 4 of this tutorial we will run these files through separate SADABS
jobs. It would have been nice to be able to process both files together (or to put
'fast' and 'slow' scans in the same .sad file), but doing it separately will result
in a higher quality final dataset. Sometimes it takes a bit more effort to make
things behave the way they should. Before we move on, however, we will run a
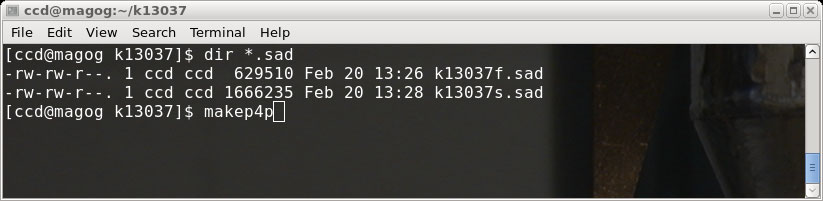
program makep4p, which writes a so-called '.p4p' file.
The '.p4p' is a Bruker-specific file that contains a bunch of crystal and data
collection related information. It can be very useful because XPREP is able to
get some information from it (e.g. cell dimensions, formula etc.),
and that reduces the amount of typing we have to do.
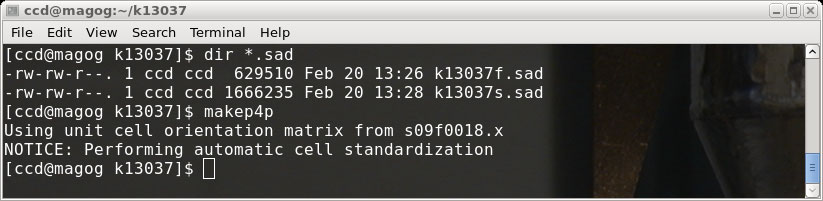
The makep4p program says that it performs "automatic cell standardization", which
may well be the case, but unfortunately it sets all the cell esds to zero. That
is the real reason that we went to the trouble of ensuring that we were able to run
nreport in part 2 of this tutorial. We need to have the best possible estimates
of the cell parameters and their uncertainties!
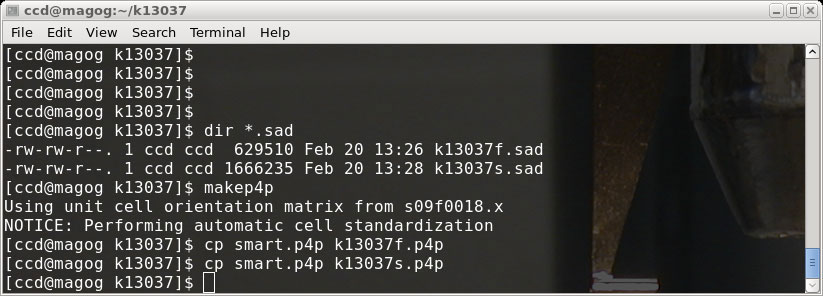
The makep4p program writes a file named 'smart.p4p'. For the sake of convenience,
make copies of this '.p4p' file for both our 'fast' and 'slow' scans, then go on to
part 4 (click below).
1) Extract the intensity data from the diffraction frames.
2) Run a first pass through with Scalepack.
3) Create '.sad' input files for SADABS.
4) Run SADABS separately for fast and slow scans.
5) Identify overload intensities and edit slow .hkl file.
6) Merge fast and slow scans in XPREP.
2) Run a first pass through with Scalepack.
3) Create '.sad' input files for SADABS.
4) Run SADABS separately for fast and slow scans.
5) Identify overload intensities and edit slow .hkl file.
6) Merge fast and slow scans in XPREP.